Thursday 6 June 2013

[TUT] Installing planes/jets

Some people still have trouble installing planes/jets into GTA IV, so i decided to create this small tutorial to help those people.


Editing the handling.dat and vehicles.ide files

Generally, when you download an plane/jet you will have an readme.txt and inside this readme you will have instructions about the installation of the model:


It indicates that you must edit handling.dat and vehicles.ide files, they commonly are located at:

C:\Program Files\Rockstar Games\Grand Theft Auto IV\common\data


First we need to make sure that the property Read only is unmarked on the file properties (for handling.dat and vehicles.ide):


Now open handling.dat with notepad and find the indicated line based on readme, commonly we will replace the airtug vehicle, so, search for airtug, you will find a line like this:


Now we copy the line from the readme.txt and replace this line in the handling.dat:


Pay attention to an detail, we have two lines to replace in handling.dat, the second line we find searching for the $ char:


Now we copy the indicated line in readme and insert above the first line that starts with $ in handling.dat:


Save and close the file handling.dat.


Now it's time to edit vehicles.ide, after making sure that this file is not Read only, open it with notepad and search for airtug (or same name used in handling.dat):


Now copy the indicated line in the readme and replace the vehicles.ide line:


Save and close the vehicles.ide file.


Installing the model

Now if you open your game and enter in a airtug as driver you will be able to fly. What we need to do now it's install the model, Open the OpenIV, select your game, open the folder models\cdimages then open the file vehicles.img and click in the button Edit mode:


Now you can use the menu Edit > Add or drag and drop the files:


Done!


Important: The name of the model is all here, if you edit handling of taxi and insert the model airtug, things wont work as expected, pay attention to the model name always.


Similar process can be used for cars, bikes, helicopters and boats, just pay attention to the lines that you should add or replace :)


Tip :)

For jets you can use the Air Combat IV script to make things more cool
For helicopters you can use the Heli Combat script to have an more intense combat

Wednesday 5 June 2013

[TUT] Animations

Animations can give another look to an modification. In this tutorial i will show what i know about animations in GTA IV, you can download the code of this tutorial here and download the list of GTA IV animation here.

We have an big list of animations to use and thanks to the people involved in OpenIV development we can see those animations without the game running, it's very useful, you can find this option in the OpenIV menu Tools > Animation Viewer:


In the next screen we can choose what kind of animation we want preview:


Clicking in Ped animations (anim.img) we will be redirected to an screen that organizes the animations by their categories:


Clicking in one of the categories we will see an new screen with an Ped in center and the list of animations in the left side, if we click one of the animations the OpenIV will start playing the animation in loop mode:


Now to make this happen in game we can do with basically two ways:
  • Using scripthook classes
  • Using native method calls


Using Scripthook classes to play animations

To play animations using the scripthook we need:
  • An animation set: This object will determine the category of the animation
  • The Animation object that each Ped have, or the Ped's Task.PlayAnimation object
Simple example:


Here I'm declaring the animation set of the category swimming, then playing the animation idle from this category, the number 8 represents the speed of the playback, this param don't seems to affect the playback all the time, seems to work only in the start.

Result:


Before use an animation it's interesting request the animations of the category, we can do this using this native call:


Now let's improve this, as we can see the player plays the animation until the animation reaches the end then go back to normal animation, but what we need to do to make it automatically loop this animation? We need to use animation flags, based on this site the animation flags that we have are:
  • Unknown01 - Don't come back to initial position after animation ends, we use this for animations that result in position change for the ped, for example the land and roll animation
  • Unknown04 - Based on translation it will make ped return to original position, in my tests don't change anything
  • Unknown05 - We use this flag to loop the animation
  • Unknown06 - We use this to stop the ped in the last animation position, ped will play animation then stop frozen in the last frame of the animation
  • Unknown07 - Seems that makes player reset to Standing idle animation after the animation ends
  • Unknown09 - This one will make the animation be played only in ped's upper body, legs wont be affected, it's interesting to be used while the ped is inside an vehicle (Nevitro tip).
  • Unknown10 - Remove the possible sound of the animation, some animations has sounds others don't
We have other flags but they seems to result in nothing like the Unknown04.

So, to make our player repeat the animation we should use the flag Unknown05:


We can combine flags with the Or operator, for example, if we want play the run animation of the swimming category we can use the flags: Unknown01 to don't come back to initial positionUnknown05 to repeat and Unknown10 to remove the animation sound:


Sometimes this play method fails when we try to put together the flags (after some reloadscripts command calls), so if the things are not happening as expected, reload the game and test again.

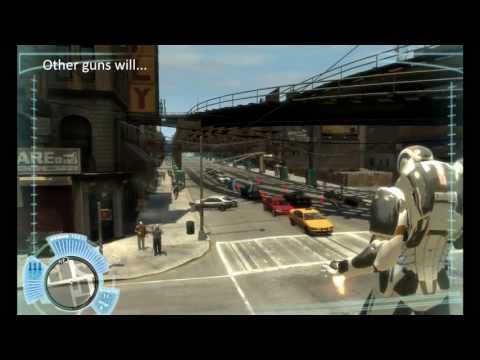
This video shows the result with and without the flags:


To stop the animation I'm using this:


Other interesting methods of the Animation class

  • isPlaying - This method returns True when the animation is being played
  • GetCurrentAnimationTime - This method return the current time of the animation


Detecting animations

We can use the isPlaying or the GetCurrentAnimationTime to determine if the ped is playing an determined animation, but to make sure that we can detect the anim we need to call the method REQUEST_ANIMS to load the animations of that animation category before we try to detect the animation play:


Using native methods to play animations

To play animations using the native calls we have this methods:

  • TASK_PLAY_ANIM
  • TASK_PLAY_ANIM_FACIAL
  • TASK_PLAY_ANIM_NON_INTERRUPTABLE
  • TASK_PLAY_ANIM_READY_TO_BE_EXECUTED
  • TASK_PLAY_ANIM_SECONDARY
  • TASK_PLAY_ANIM_SECONDARY_IN_CAR
  • TASK_PLAY_ANIM_SECONDARY_NO_INTERRUPT
  • TASK_PLAY_ANIM_SECONDARY_UPPER_BODY
  • TASK_PLAY_ANIM_UPPER_BODY
  • TASK_PLAY_ANIM_WITH_ADVANCED_FLAGS
  • TASK_PLAY_ANIM_WITH_FLAGS

The more interesting here is the TASK_PLAY_ANIM_SECONDARY_UPPER_BODY because that method will play the animation only in the upper body of the ped, it's useful when we need to play an animation while the player is walking or running, example:


First param is the ped, second is the animation name, then comes the category name, number 8.0 represents the playback speed, I declared p1_Repeat and p4_... to make clear of what is the function of that parameter in the method call, if we set those params to one or true we will enable them, they act like flags, the last param determine the time in milliseconds that the animation will be played, if we set an time smaller than the total animation time the animation will end before reach final frame, this time is not precise because it is affected by game FPS.

The TASK_PLAY_ANIM_SECONDARY_IN_CAR it's interesting too because we can use this to play animations while the ped is in an vehicle, the params are same of the TASK_PLAY_ANIM_SECONDARY_UPPER_BODY method.

I don't will talk about the other anim methods because they have similar results of the Scripthook methods.


Other interesting methods related to animations

  • HAVE_ANIMS_LOADED - We can use to check if the REQUEST_ANIMS call finished the loading of the animations of the category, params: category name
  • IS_CHAR_PLAYING_ANIM - To check if player is playing an animation, params: ped, category name and animation name
  • GET_CHAR_ANIM_CURRENT_TIME - Get the animation time, params: ped, category name, animation name and a pointer to an variable (of type Single) to store the time:


SET_CHAR_ALL_ANIMS_SPEED - This one will set an new playback speed for all animations that the pPed is playing, params: ped and new speed multiplier (float number). For example, to set player anims to 150% the normal we can do:


SET_CHAR_ANIM_SPEED - This one is similar to the one above, the difference is that this one will affect one animation only, params: ped, category name, animation name and speed multiplier


SET_CHAR_ANIM_CURRENT_TIME - We can use this method to set the animation time, 1.0 is 100%, the end, 0 is the start, very useful to control the animation, we can make and fake reverse playback reducing the percent number, params: ped, category name, animation name and playback percent/100 (from 0 to 1.0)


SET_CHAR_MOVE_ANIM_SPEED_MULTIPLIER - This one changes only the ped movement animations speed, params: ped and speed multiplier

SET_ANIM_GROUP_FOR_CHAR - This one changes the ped animations group, will affect his walk, run, idle animation, etc., params: ped and animation group

To use this last one we need to call the REQUEST_ANIMS to load the animations of the chosen movement category before use the method:


We need to be careful with this native call because if we set an invalid movement group we crash the game :)
Generally the names of the groups starts with move_, for example: move_player, move_melee, move_rifle, etc.. You can download the list of animations and see the categories that start with move_ here.
pernas

[TUT] Flight ideas for peds

I know basically three ideas that can be used in GTA IV to simulate an ped flying.

  • One: Control ped velocity property
  • Two: Control ped current vehicle speed
  • Three: Control an object velocity, and attach the ped to this object

To control the direction of the flight we can use game camera direction or create and vector3 to control the direction using keys like we can do with an plane or helicopter.

Download the code of this tutorial here


First ped flight idea (Basic one)

Method one is very simple but has some limitations, all we need to do is control the ped velocity, if we set the ped velocity is x=0, y=0 and z=1 we will make it float because he will be frozen in X and Y and will be with 1 in Z, and considering the common 3D vector components X and Y means horizontal measure and Z vertical:


Result:


The limitations of this idea, that i noticed, are:

  • Speed, we can't reach more than 80 (mph i guess)
  • Can't control Pitch and Roll, we can't change the pitch or roll of the ped so we will always have the animation pitch or a hard to control pitch in result of ragdoll state, we only can set the heading


Controlling the flight

To generate an controllable flight we can:

  • Change directly his velocity to the vector velocity that we want, for example, we can make him move in the camera direction setting the ped velocity to be equal the camera direction, also we can use an incremental multiplier to determine the speed multiplying the camera direction by the multiplier.


Result:

As we can see we have some side effects, for example, ped can turn into Ragdoll state and then we are vulnerable to collisions and we can accidentally trigger that automated ground camera that is used to look at ped when he is falling.


  • Or we can set ped velocity to always zero (vector3.zero - x, y and z = 0) and use ApplyForce to push the ped to where we want, controlling his flight:


Result:


It's more easy use the second idea.


Second ped flight idea (using invisible vehicle)

This ped flight idea i saw for first time in Superman script made by nixolas1, i used same concept in my Simple Car Fly cheat with no good results because cars have some kind of turn mass velocity (or inertia) that affects the rotation of the car when hit something.

In resume the idea consists in warp or attach the ped to an invisible vehicle, then control vehicle velocity and direction. I use an small bike (Faggio) because bikes have an better result with this speed control idea and the "collision area" is smaller :)

So we need an vehicle:

We need to create this new vehicle and hide it:


And, when activating flight, we need to attach or warp the ped into this vehicle:


Ok, now we have our invisible bike:


Let's make it fly, in the tick we need to change this bike direction based on the flight direction and control his speed to make it float.

We can do this setting bike speed to zero and using ApplyForce to push the bike in the flight direction, but we will have the max speed of 80 again. To reach higher speeds we need to use an native call:

SET_CAR_FORWARD_SPEED

Using this native call we always will move the bike in his direction with the speed determined by the native call:

Native.Function.Call("set_car_forward_speed", myFlyingVehicle, force)

One side effect of this idea is that with speeds over 200 we have some instability, sometimes speed just drops back to 80 :(


Result (Obs.: In this vid i'm already using the flight animations):


I'm not sure why i can't make it fly with speeds higher than 80 in this script sample, in Iron Man IV i use same idea and can reach more than 80.


Third ped flight idea

An third flight method is use an object and the native call SET_OBJECT_INITIAL_VELOCITY:


Also we need to attach the ped to this object and detach when finish the flight:


The flight animations

To make the impression of flight more real we can use some EFLC parachute animations like:
  • full_brake_for_landing - To simulate an float state with low speed
  • free_fall_deccelerate - To simulate an medium flight speed
  • free_fall_fast - To simulate an flight at full speed
To use this in GTA IV we need to export the parachute.wad from EFLC anims.img and import into GTA IV.

To make the ped play the animation we use this:


And to stop the animation:


I will talk more about animations in a future tutorial :)

Saturday 1 June 2013

Adf.ly tip

As you can see i use Adf.ly in great part of my links to earn some money :)

Yes, i need money, and to don't sell my mods i use Ads in links, it, generally, costs only 5 seconds of your life and who really pays is the owners of the Ads.

The intention of this post is help some people that may have difficulties with the Adf.ly system, if you don't have trouble with Adf.ly, just ignore this post :)

So, how it works?

When you click in an Adf.ly link you will be redirected to an page with this layout ( mine is in portuguese ;) ):


In the top we have the Adf.ly header with the time counter and in the center of the page the Ad, when the time counter reaches zero an button should appear (Skip Ad), you should click in this button to be redirected to the desired link:


Simple right? 5 seconds of your life ;)

Thanks for the comprehension


If you want join this Adf.ly group, you can click here and make your Adf.ly registration, and start sharing your links with Adf.ly and earn some money, it's a very good idea and does not cost anything to try.

Tuesday 28 May 2013

Iron Man IV - Installation guide (based on last version)

Last version of Iron Man IV may need some different steps to be installed, i will describe the installation step by step here.


*** BEFORE TRY THIS MOD ***

1-Make sure that you have at least GTA patch 1.0.4.0 installed

2- Make sure that you have the following installed:

and maybe:

3- Make sure that you can load .Net Scripthook scripts or you will not be able to run this mod :(

*** o.O ***


Installing the basic

1-Download the main mod here
2-Extract all files to an folder (you may need WinRar to extract), you will have this files:


3-Copy all files to your GTAIV.exe folder (or EFLC.exe folder if you are installing in EFLC) and overwrite everything (files and folders):


Now let's see if the script is loading, open the game and press " (or for some keyboards ~) an black window should appear, the text "Iron Man IV script loaded" should appear:


Press Esc to close the console window then press number 0 (not the numpad0) an menu should appear at left top corner:


If you can see the mod menu we can proceed with the installation of the other mod parts, if not let's see what can be wrong:

Game crash and/or closes at loading screen:
  • This can happen if you are using patch 1.0.4.0, in this case you need to copy ScriptHook.dll from folder "DLL for 1.0.4.0" to your gtaiv.exe folder and overwrite the old one.
  • Or this can happen if you forget to copy Microsoft.Xna.Framework or NAudio dll to gtaiv.exe folder.
Game opens but when you press " or ~ no black window appears:
  • Your ASI loader or Scripthook is not loading :(, i cant help you in this case, you need to find out why this is happening, maybe you need another version of ASI loader or scripthook.
Game loads but the message: "Error in script 'Iron Man'" appears at left top corner:
  • This can happen in result of incompatibility with other mods, press " and type the command reloadscripts, if error happens again you can try to temporary remove other mods and test.
  • For some reason you computer can have some kind of incompatibility with XNA Dll, in this case you can try the Iron Man.net.dll file from folder "no XBox 360 Control support version", paste it on Scripts folder and overwrite the old one.
Getting this error message when launching the game:


Probably related to Administrator rights.
  • Solution one: Right click game icon and click in Run as Administrator
  • Solution two: Download this file and put inside GTAIV.exe folder (or EFLC.exe folder)
Source of those last two solutions: http://www.gtaforums.com/index.php?showtopic=400482


Installing the animations (EFLC don't need this step)

1-First of all, close the game ^^
2-Open the OpenIV, choose Grand Theft Auto IV, open the folder anim, open the file anim.img then click in Edit mode:


3-You can drag and drop the file parachute.wad from Animation folder or use the OpenIV menu Edit > Add:


*If you can't install the animations in GTA IV using OpenIV, you can try replacing original game anims with this one, please, rename the original to something like anims.img.original before replacing :)
(press ctrl+s to download the file):


The anims.img folder commonly is: C:\Program Files\Rockstar Games\Grand Theft Auto IV\pc\anim
Always change game files with game closed.


Installing the armors

Now we will install the armors, you have two indicated options now, one is use the add peds method of the all-in-one pack or use the replace mission characters method, i recommend the second.

Let's say that you choose the replace method:

Close the game first :)

1-Download it here
2-Extract all files to an folder, you will have this:


3-Open the folder "armors (replacing mission char.)" then open the folder "to drag to Iron Man IV Armors folder", select all files right click them and Copy:


4-Open your Iron Man Armors folder (created at gtaiv.exe folder on first steps) delete everything that can be there and paste the previous copied files:


5-Now open the folder "to drag to componentPeds.img with OpenIV" we will insert those files using OpenIV. Open the OpenIV, choose Grand Theft Auto IV, open the folder models, then folder cdimages then open file componentpeds.img, click in Edit mode:


6-Now you can drag and drop all the files from the folder "to drag to componentPeds.img with OpenIV" or use the OpenIV menu Edit > Add and select all files:


The OpenIV will freeze for some seconds, it's normal.


The main armor (MK III) will replace the player, with this pack you have two options:
  • One to replace player but keep player original visual
  • And one to replace player and replace Niko's head with Tony Stark's head


Choose the one that you want, open the OpenIV and open the folders models\cdimages, now use the menu Edit > Add and select the desired playerped.rpf (or drag and drop the chosen playerped.rpf file). Don't forget to enable the Edit mode


Done! Everything is installed, open the game and try to equip each armor to see if they work fine.