


In this video i show how to install an new armor, the step by step is described bellow...
Check how to install version v1.1 or v1.2 here
Check how to add armors without replace game peds here
Installing the ped model


2 - Choose an ped model name to replace and rename the armor files to this new ped model name:

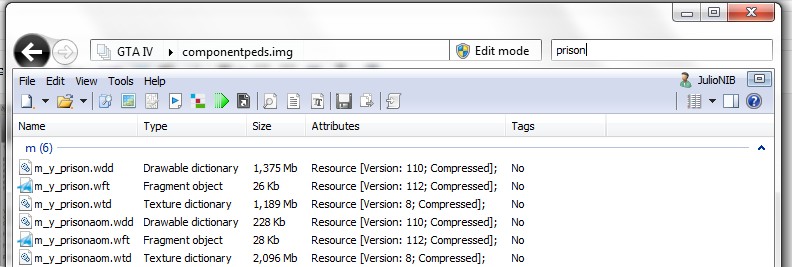
Good names to use: Any mission character ( starts with ig_, i tested in patch 1.0.4.0 and 1.0.7.0 and seems to don't cause problems :) ), m_y_prison, m_y_prisonaom, m_y_multiplayer, use OpenIV to check the correct names:


3 - Open the OpenIV, click in "Edit mode" to activate the edit mode, answer Yes to the question after the click.
4 - In OpenIV, open folder models\cdimages and open file componentpeds.img:


5 - Drag and drop all armor files to OpenIV, also you can use the menu Edit > Add instead of drag and drop
To check if new armor is ok, find the armor file that ends with .wdd and double click it (in OpenIV)
Check the check boxes at left top corner to see all armor parts:

*Some armors can appear without the textures but in game they should look fine.
Installing/creating the config file for the armor
Now, let's create an new config file for this armor:
1 - Open the GTAIV.exe folder, then open Scripts\Iron Man files\Armors:

2 - Make an copy the armor_2.ini file and rename to the name of the new armor, let's use "armor_war machine.ini":

*Don't remove the .ini extension :P
3 - Open the new file with an text editor, now we will set some configuration:

You must edit the model option and set the name of the model chosen before, in this example: ig_romanw.
Also set the name option to set the display name for armors menu.
The other options are less important.
Save and close the file.
Now it's just open the game and see if a new item appear with the chosen display name :)
Some armors can come with playerped.rpf file, in this case you replace the player and not a common pedestrian, so instead of opening file componentpeds.img, you just replace the playerped.rpf file in same folder and set the model option with name player in the armor .ini file.
Obs.: Make sure to use different model name for each armor, otherwise you will have wrong model for some menu items :)
Check the new armors post :)


0 comments:
Post a Comment